User Group and Privilege Management
Authorized users can manage ATMS User Groups, which are used to assign privileges to users, and to determine which notifications users should receive.
User Group List
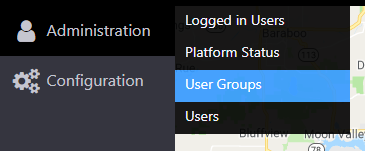
To view the list of User Groups that are configured in ATMS, select User Groups from the Administration menu of the left hand navigation bar.
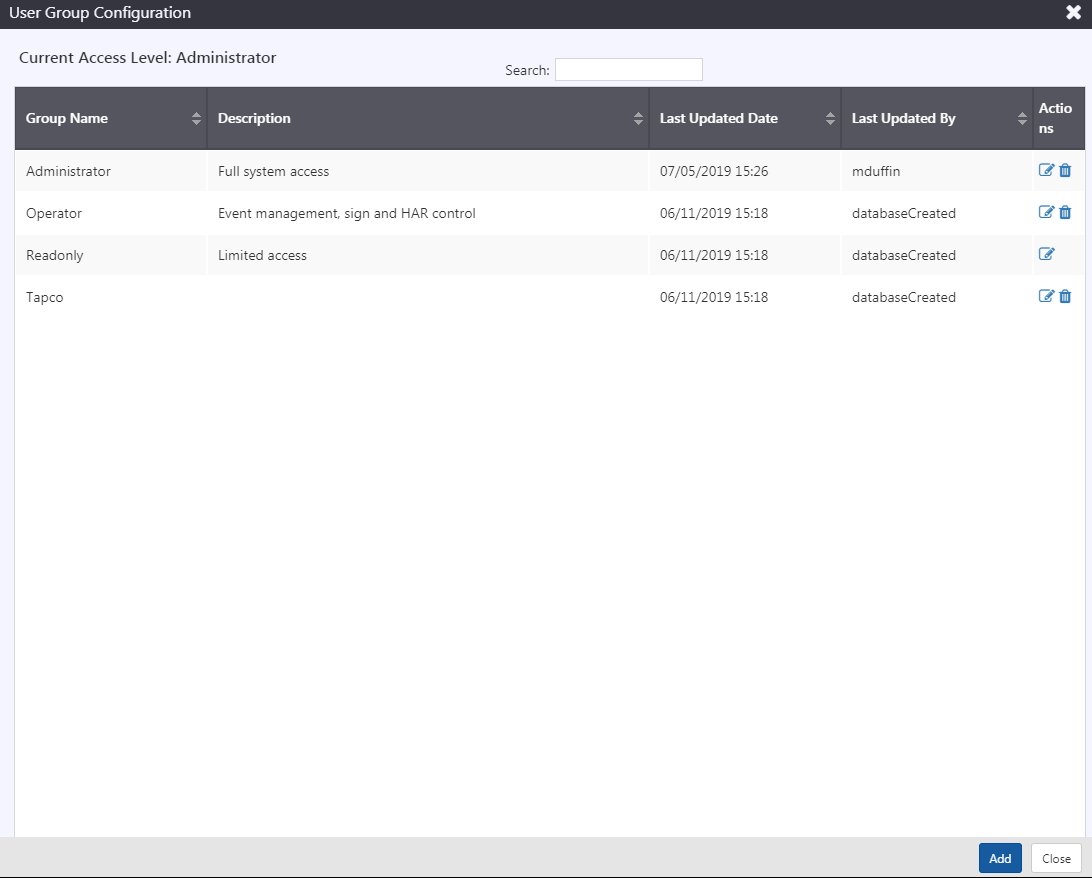
The User Group list indicates the Name and Description of each group, and provides actions to edit or remove groups. You can also Add User Groups from this view.
Add a User Group
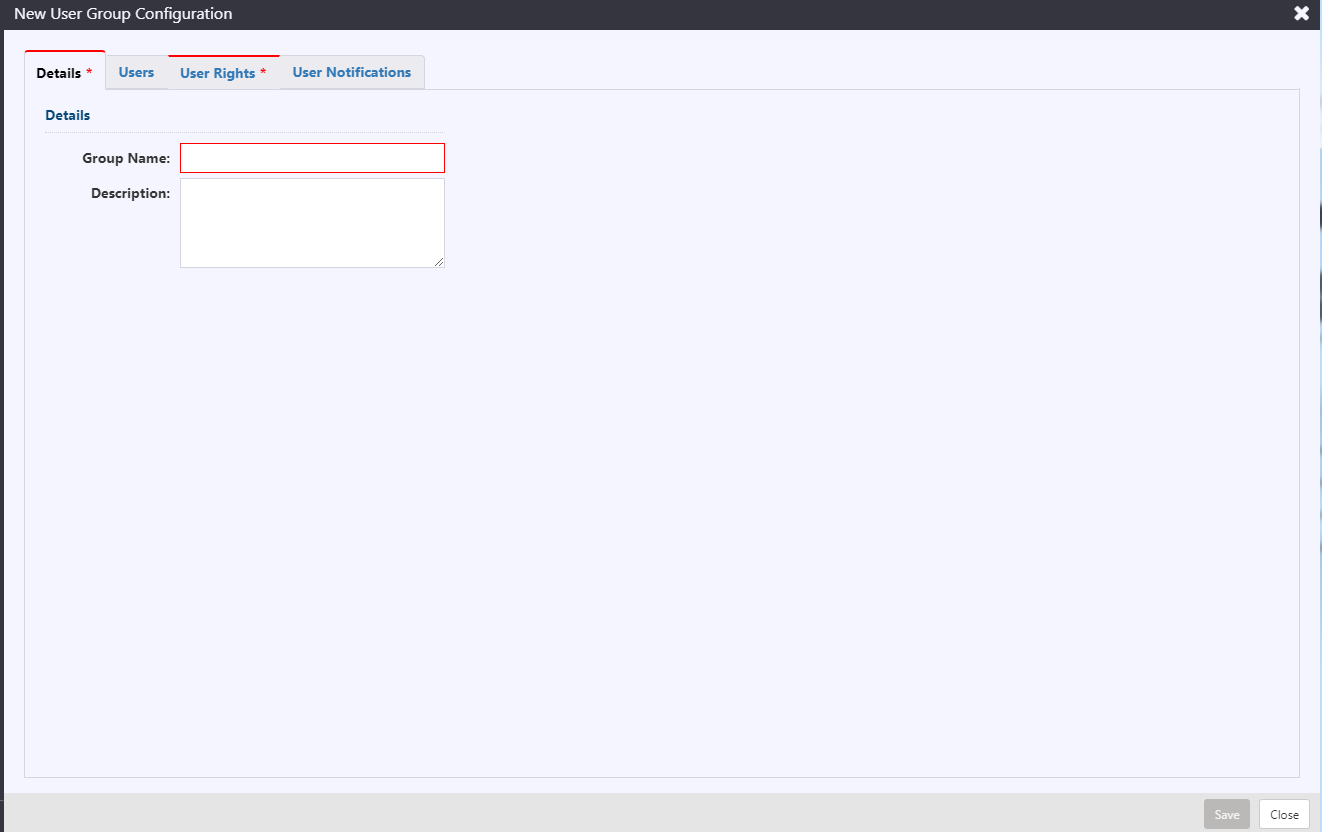
To Add a User Group, open the User Group list and click Add. Enter a name and description for the group, select users, user rights and notification subscriptions for the group and click Save. Details on selecting Users, User Groups and User Notifications for a User Group are included below.
Edit a User Group
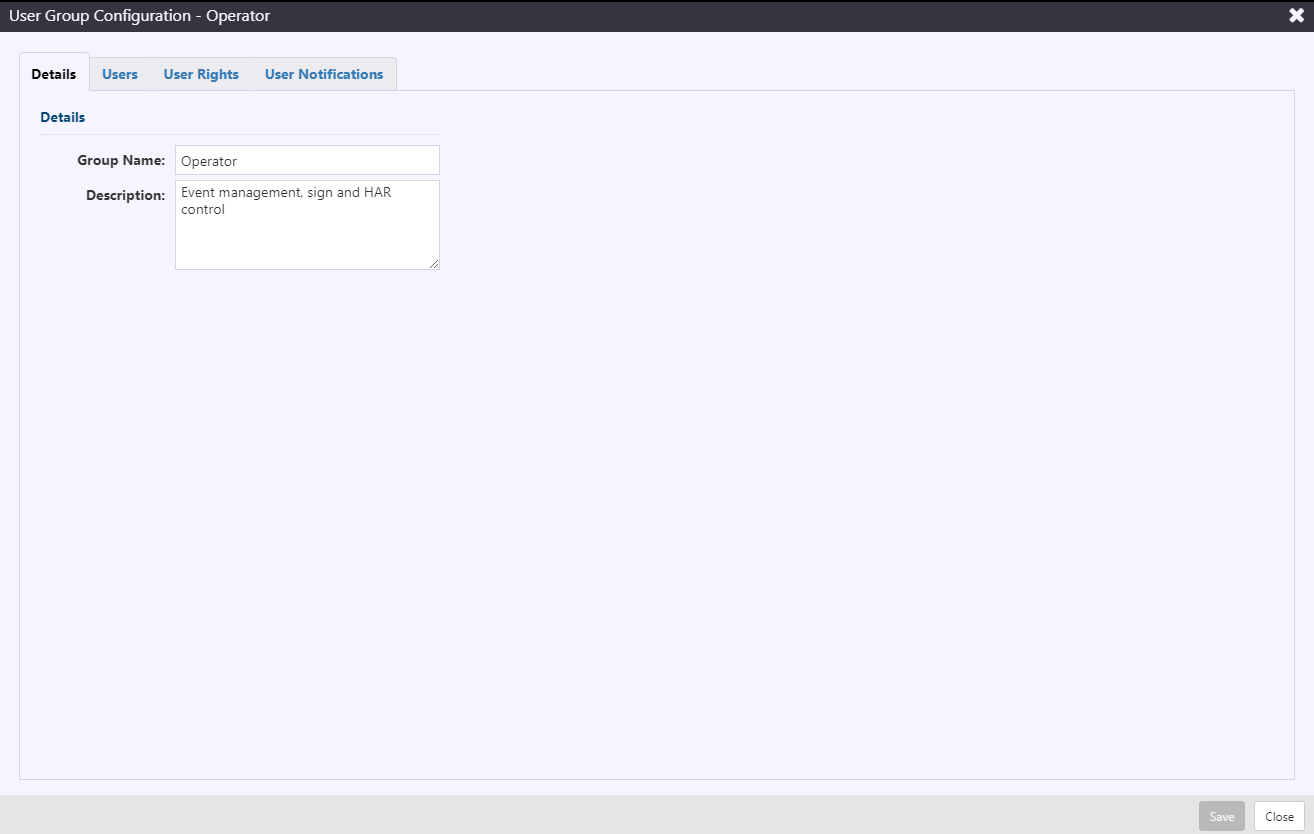
To Edit a User Group, open the User Group list and click the button for the target group. Update the name, description, users, user rights and/or notification subscriptions for the group and click Save. Details on selecting Users, User Groups and User Notifications for a User Group are included below.
Remove a User Group
To remove a group, open the User Group list and click the button for the target group. If any users are assigned to this group when it is removed, they are automatically re-assigned to the Read Only group. Changes to user privileges will be applied the next time users log in to the system.
Set or Change User Group Users
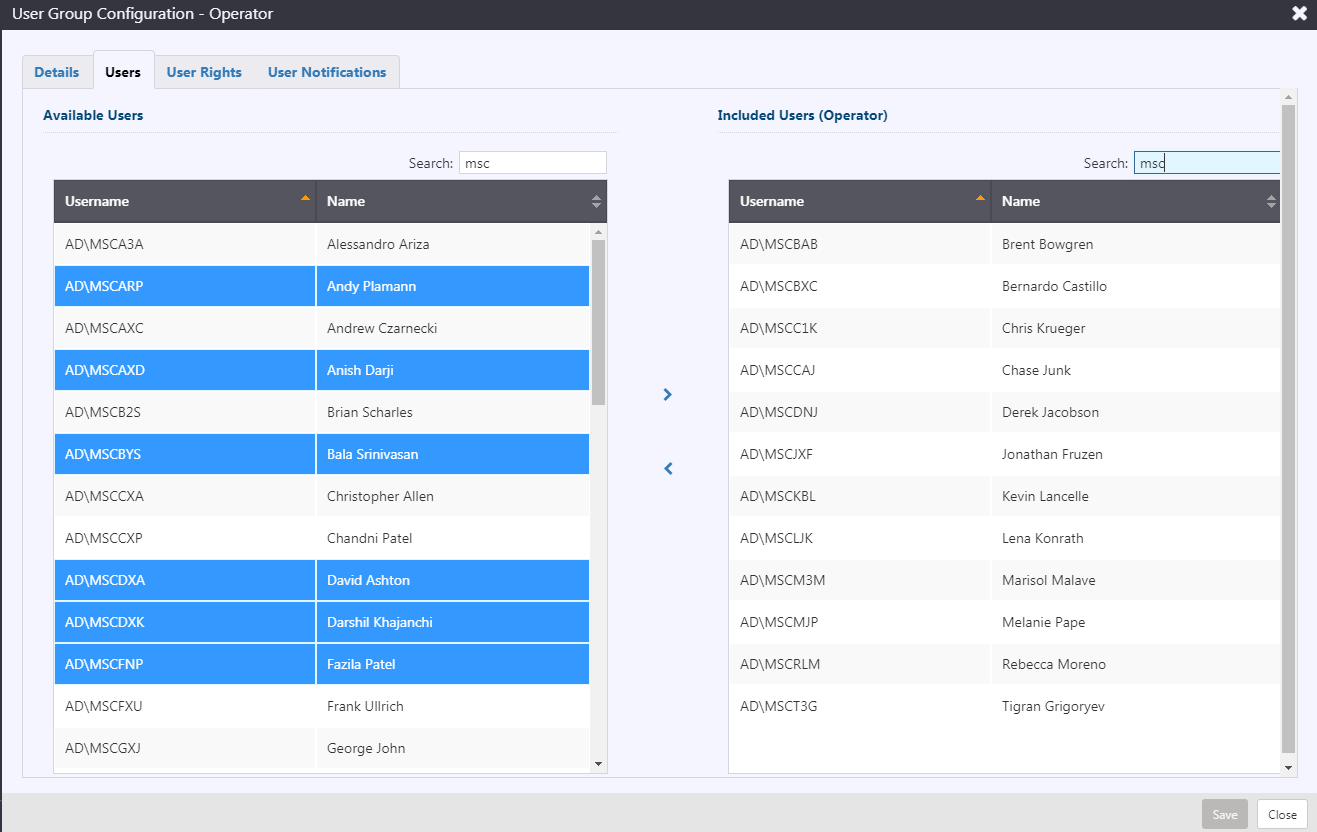
To select the set of users that should belong to a User Group, Add or Edit a User Group and click on the Users tab. The list of users that are available to add to the group is presented on the left. The list of users already included in the group is on the right.
To add users to the group, select one or more users from the Available Users list and click the button to move them to the Included Users list. Hold CTRL or SHIFT while clicking to select multiple users. Selected users are highlighted in blue.
To remove users from the group, select one or more users from the Included Users list and click the button to move them to the Available Users list. Hold CTRL or SHIFT while clicking to select multiple users. Selected users are highlighted in blue.
Click Save to save the changes to the user group. If users have been removed from the group, they are automatically assigned to the Read Only user group.
Set or Change User Group User Rights
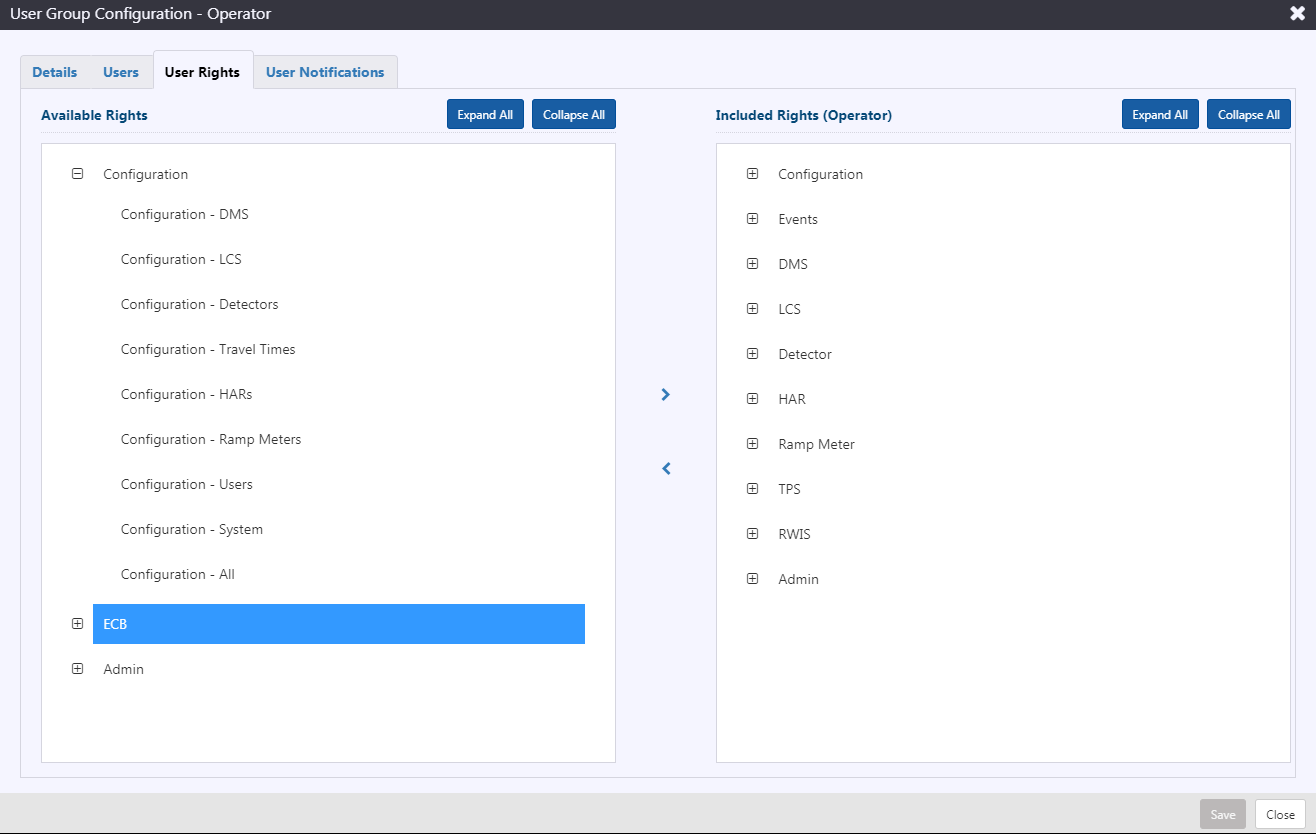
To select the set of privileges that should be assigned to each member of a User Group, Add or Edit a User Group and click on the User Rights tab. The list of privileges that are available to add to the group is presented on the left. The list of privileges already included in the group is on the right.
The rights are grouped by area of the system they apply to – areas include Events, DMS and other devices, Configuration and Admin. You can expand or collapse each grouping using the and
buttons. You can expand or collapse all groups using the Expand All and Collapse All buttons for each list.
To add a privilege to the group, select it from the list of Available Rights and click the button to move it to the Included Rights list. To add all privileges within an area, click on the area header and click the
button.
To remove a privilege from the group, select it from the list of Included Rights list and click the button to move it to the Available Users list. To remove all privileges within an area, click on the area header and click the
button.
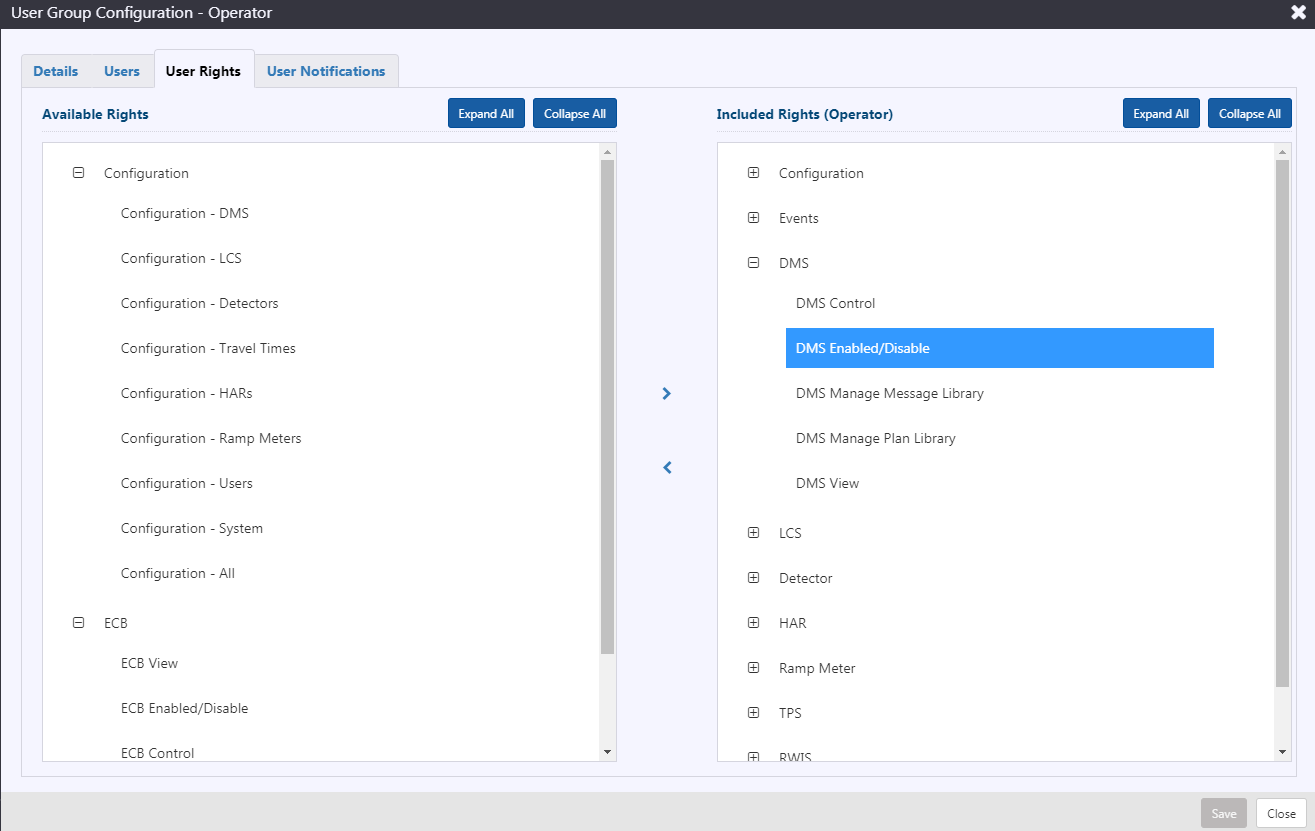
Click Save to save the changes to the user group. Changes to privileges will take effect the next time each user that is part of this group logs into the system.
Set or Change User Group User Notifications
To select the set of notifications that users in a User Group should receive, Add or Edit a User Group and click on the User Notifications tab. The list of notifications that are available to add to the group is presented on the left. The list of notifications already included for the group is on the right.
The notifications are grouped by area of the system they apply to areas include Events, DMS and other devices, and External Events. You can expand or collapse each grouping using the and
buttons. You can expand or collapse all groups using the Expand All and Collapse All buttons for each list.
To subscribe a group for a notification, select it from the list of Available Notifications and click the button to move it to the Included Notifications list. To add all notifications within an area, click on the area header and click the
button.
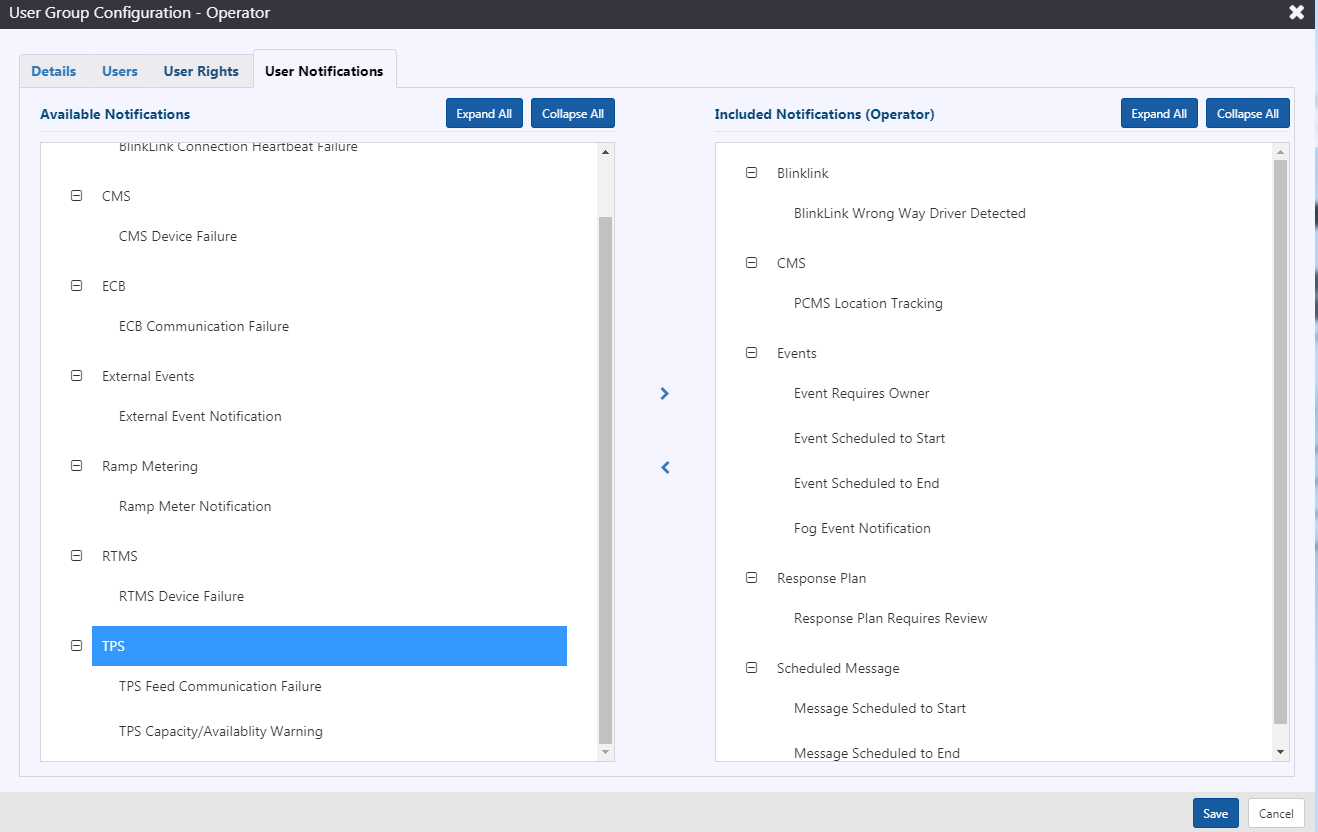
To unsubscribe a group from a notification, select it from the list of Included Notifications list and click the button to move it to the Available Notifications list. To remove all notifications within an area, click on the area header and click the
button.
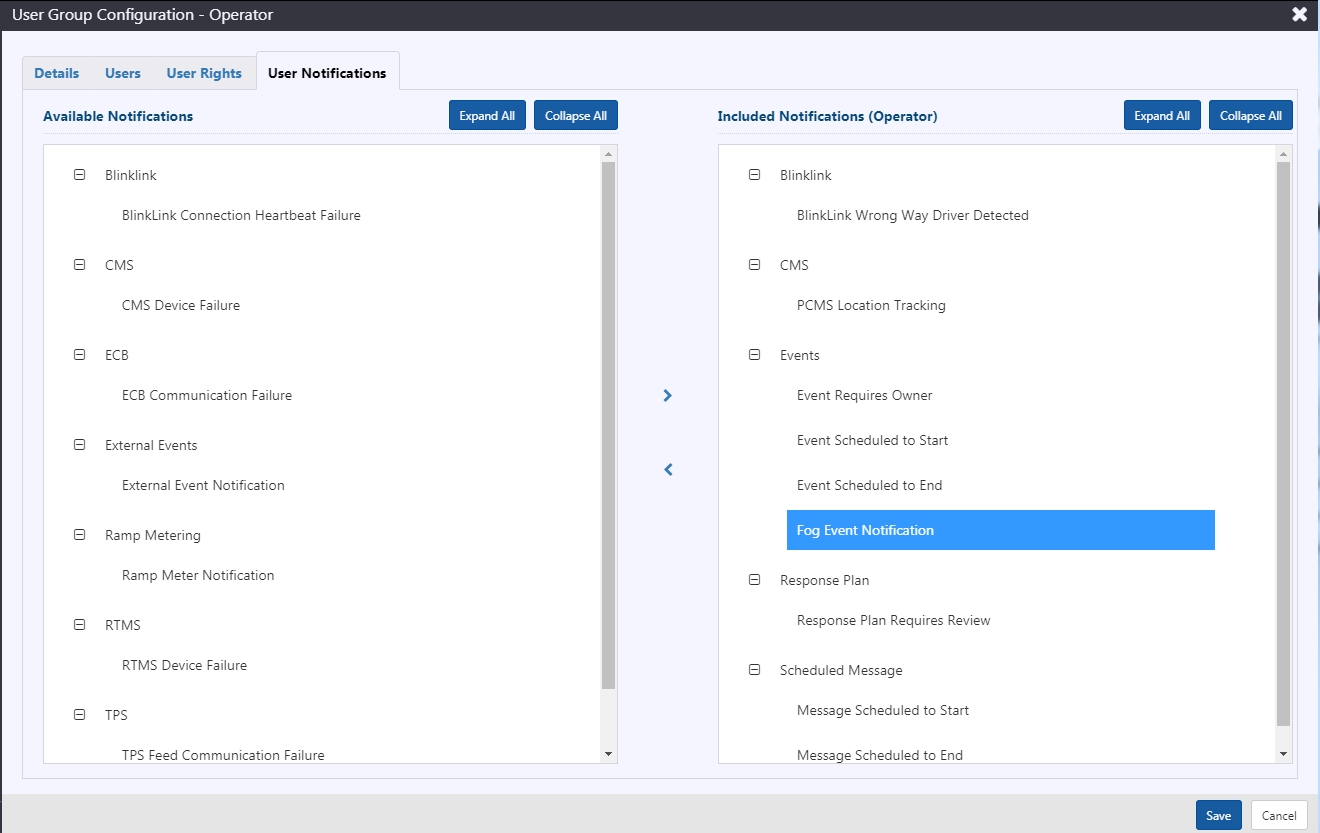
Click Save to save the changes to the user group. Changes to notification subscriptions will take effect the next time each user that is part of this group logs into the system.